Tuesday, January 13, 2015

Frozen Fun

     So what's a party with out some party activities?  While we were waiting for all the girls to arrive, the little princesses drew some beautiful snowflakes on the white paper I had on the floor.  It was a great beginning activity to keep them busy.


     Once everyone had arrived, I took the princesses outside for some snow fun!  I had purchased a mini snow machine, which I set up to surprise them.  Once I turned it on they were so surprised!   It was great to watch them having so much fun, jumping, dancing, running, and laughing as the foamy "snowflakes" floated down on them. 


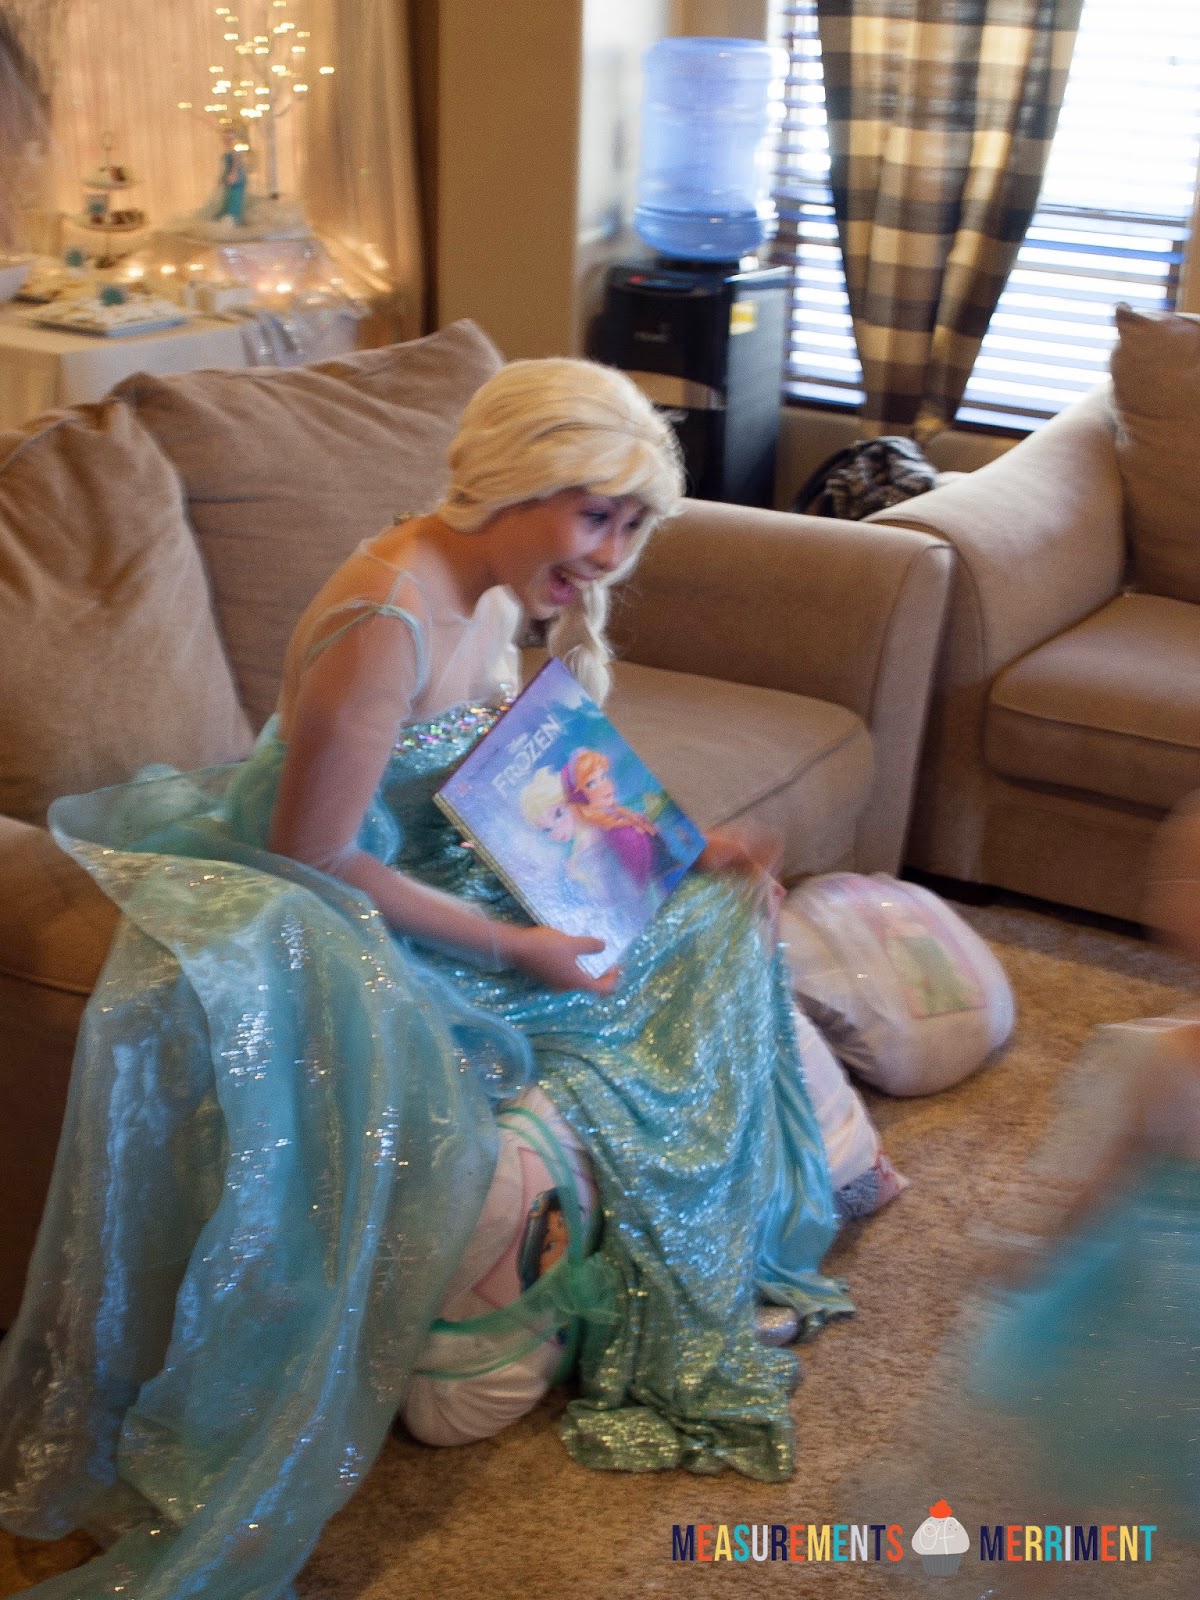
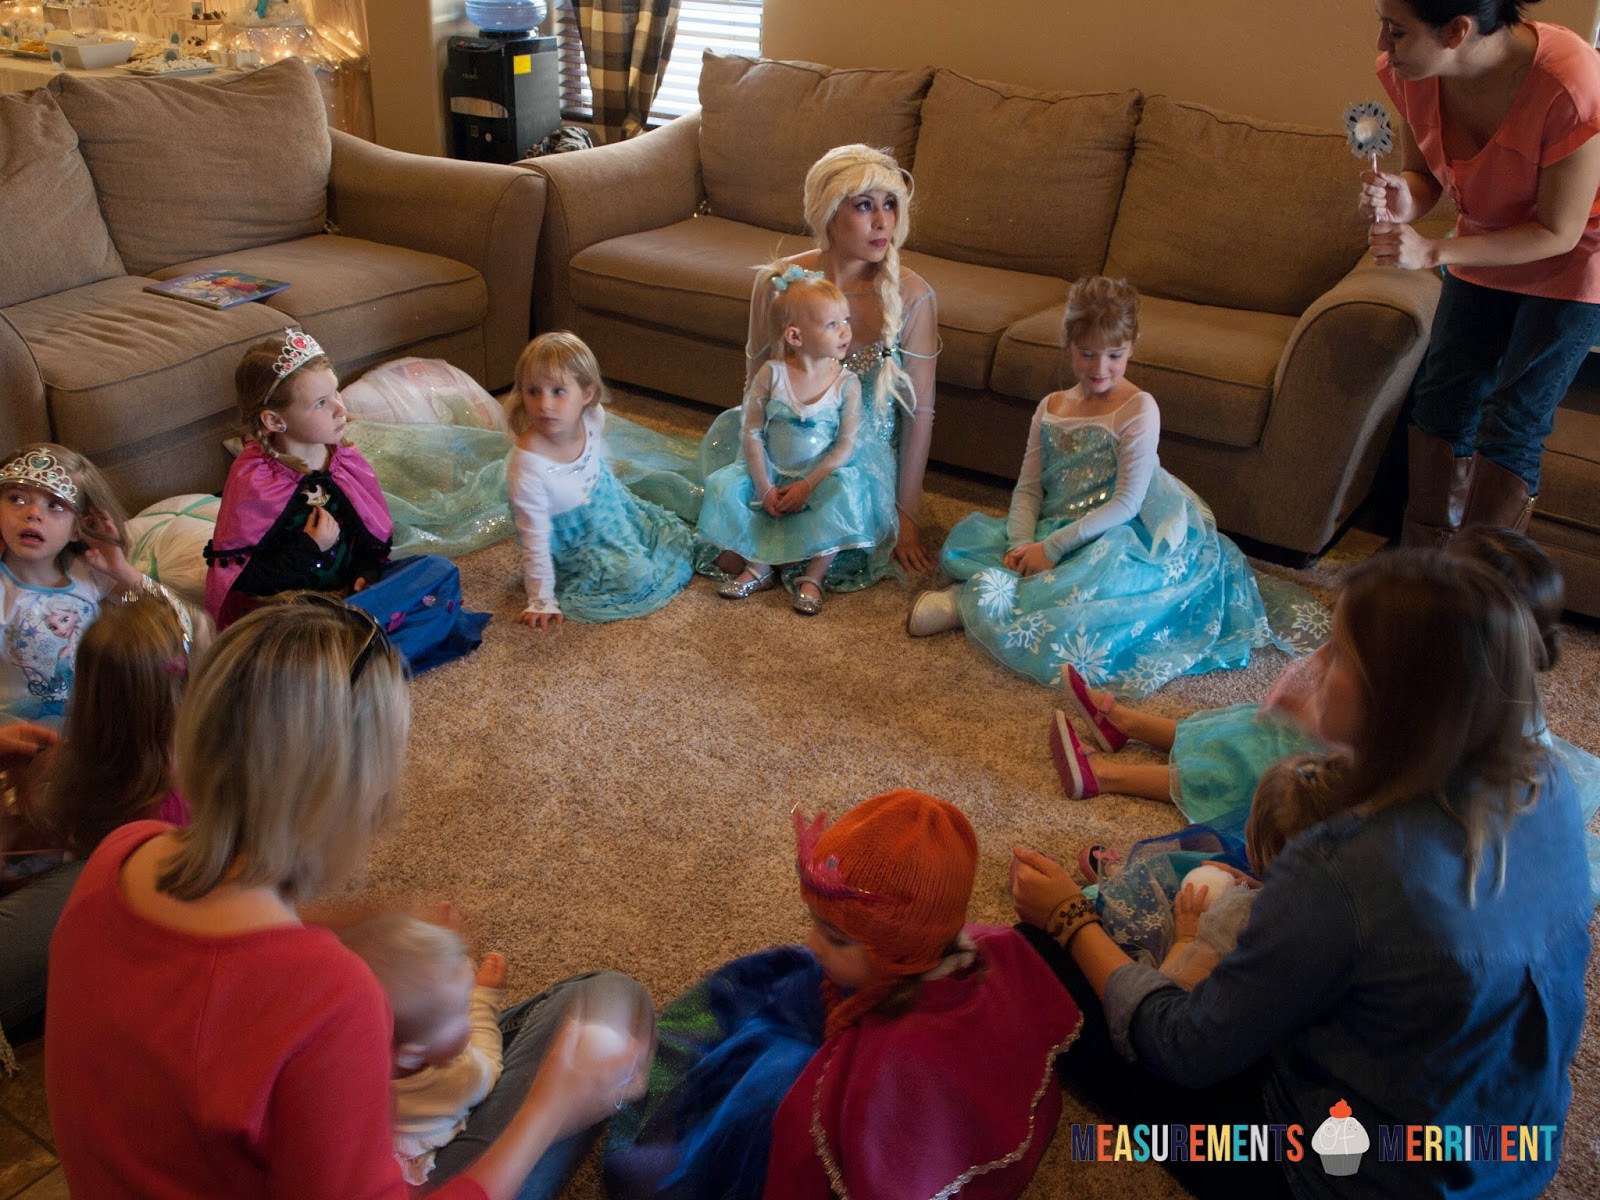
     After some fun outside in the "snow" we headed back inside to be greeted by a special guest!  Queen Elsa had stopped by to spend some special time with all the princesses. (I hired her from A Princess for Hire)


     She first read the story of Frozen to all the girls.  Kinley was so happy she was there and just had to sit next to her.


     When the story ended, all the girls gathered around to play Pass the Wand.  It was like musical chairs, when ever the music ended the princess who was holding the wand got to go make a magical wand for herself.  The girls really enjoyed it and the craft.


     Making princess wands with Queen Elsa is always magical!


     After lunch, the little ladies got their hair and nails done by Queen Elsa.  


     All beautified and sparkles in their hair, the girls played a couple more games including a Cinderella's Glass Slipper Hunt, the Princess & the Pea, and Kiss the Prince.


     As a party favor for all the girls, and two boys (which were my son and his friend, who pretty much stayed in his room playing legos, except to eat) were given one of these.  I found some cute Frozen and Marvel Super Hero glow sticks and some Frozen Jelly Bellys at Walmart.  I taped them together then my friend attached a "Thank You SNOW Much for Coming" tag and a snowflake at the top.  I created the tags on PicMonkey then had them printed at Office Max. 


     All the girls had so much fun with all the planned activities.  My favorite part though was seeing their faces light up with Queen Elsa walked it.  It was priceless!  It brought a HUGE smile to my face.  I have one more post, which I am so excited to share with you and you'll see why if you check it out tomorrow!  Might have to do with a certain princess who I have a lot of similarities with....


post signature

Monday, January 12, 2015

Frosty Finger Food

     To me a serving amazing food is one of the most important details to hosting a great party.  It's actually one of the first things I do.  Coming up with a menu that best goes with the party theme can be a challenge but one I love to face.  Since it is a Frozen theme party with a winter wonderland feel, the foods needed to be white.  I placed everything on a white platter or bowl to stick with the winter wonderland theme.  

     For the Snow pops I covered a box with silver snowflake wrapping paper, put some floral foam inside to stick the pop sticks into, then topped with some pearl gum balls.  The snowflake bowls I found at Target.  

     As for the food cards, I created them on PicMonkey, had them printed at Office Max.  Then glued them to some snowflake craft paper.  The stands are just styrofoam balls that I cut into halves, spray painted white, dusted with plastic snow.  Then cut a small slit into the tops to put the food cards into.


Here's what we enjoyed....

Turkey & Peanut Butter and Jelly Snowflake Sandwiches


White Cheddar Cheese Snowballs


Ranch Snowflake Pasta


Snow Covered Pretzels


Icy Kisses & Warm Hugs


Powdered Donut Hailstones


Bottled Melted Snow


     It was a pretty simple buffet, kid friendly and so yummy!  Can't wait to show you all the fun we had at the party.  Check it out tomorrow!


post signature

Sunday, January 11, 2015

Welcome to Arendelle.....

     Every year I try and do a fun party during Christmas time.  The first year we were here I hosted a Santa Letter Writing Party for Liam and his friends, the following year I hosted a Christmas Cookie Swap with my friends.  This year I wanted to do something a bit different and really over the top.  

     Now days it's hard to go anywhere without seeing Queen Elsa and Princess Anna's or even Olaf's face plastered on lunches boxes, t-shirts, watches, alarm clocks, books, phone covers, dolls, karaoke machines, scooters, cups, socks, fingernail polish, pillows, bedding....the list can go on and on and on and on.  But of course, we too, have given in to the Frozen phenomenon!  Kinley absolutely LOVES the movie as well as Liam. With our recent meeting of Queen Elsa at Walmart, I thought..."You know what would be fun?  Having a Frozen Christmas party this year."  So, then the idea was born!  This year, we will be partying in Arendelle!

     I got the idea for the party in October, so I had 2 and half months to plan and find decorations.  It was a total bonus that Christmas was right around the corner and all the snowflakes decorations were being stocked everywhere.  One thing I knew is that I wanted to stay away from the Frozen characters and I wanted the main color to be white with little touches of blue.  Like a walking into a winter wonderland.  After everything was set up, I totally captured my vision.  I didn't want to take it all down.


So here is the entry way.....

     I hung some fringe snowflake curtains in the main doorway to the living area to make the reveal a little more special and doorway to block off the kitchen (found the curtains on Amazon).  I lined the floor with white butcher paper to make it look a little like a magical path of snow that lead to the living area, then drew some snowflakes on it and lined the edges with the fluffy "snow" I found at Walmart (found the paper on Amazon).


     These tall white tinsel spiral trees I found at Target, the Let It Snow sign and white cone tree at Hobby Lobby.


     As I was decorating I thought the wall looked too bare, so I draped some white garland and some large snowflakes I found at Walmart and Hobby Lobby.


     This was one of my favorites...Our little entry bookshelf got a Frozen makeover too!  I draped some sparkly snowflake fabric I found at Walmart to hid the bookshelf.  Then wrapped some books in shiny snowflake wrapping paper.  Topped those off with a cute silver snowflake latern, white dove, and plastic snowflake from Hobby Lobby.  On the shelf I placed a pretty Merry Christmas sign, some frosty trees, and plastic snow from Hobby Lobby too.  I fell in love with the white mitten garland I found at Target.  The white tree with snowflake ornaments I got at Target.  The pretty mirror sign was also at Hobby Lobby.  Let's just say I had A LOT of fun shopping at HB for decorations, especially since they were all marked down 40-50% off!!!


     I placed Queen Elsa up in the shelf too (it's just Kinley's new ornament she got this year).


    As you make your way through the snowflake curtain, this is what you saw!  Snow and snowflakes falling from the "sky".  It was so magical.  Really looked like you were walking in a winter wonderland.  And yes, I did string ALL of these.  I found all sorts of white snowflakes, sparkly ones, little ones, medium ones, big ones, glittery ones, shiny ones, puffy ones, sequin ones at HB, The Dollar Tree, Walmart, and Target.  Then I used fishing line and one by one strung them up.  I also strung some different size cotton balls to look like falling snow.  Then tacked them up to the ceiling with push pins, well actually my mom did them for me.


Onto the drink and serving station...

     This wall too was really bare.  I covered the buffet with a thin white fabric shower curtain I had on hand, then some pretty opal fabric I found at Walmart.  I strung some white warm lights then topped with the fluffy "snow".  It made it look so pretty with glowing snow.  


     I create the Let It Snow banner on PicMonkey then printed it out at Office max.  My very awesome friend, cut the letters into pendents and strung them together for me.  Added a few snowflakes for some flare and voila!


     To add a little Frozen to it, I placed Sven pulling a little sparkly sled I found at HB with the rolled up glittery utensils in snowflake napkins tied with a ribbon (found the Napkins,  Utensils, and Plates on Amazon).  For the cups, I found some clear plastic ones at Target then Kinley helped put on some snowflake stickers on them.  The pretty lit tree in the background was a fabulous find at Target.  


Into the living area...

     Of course I had Frozen playing non stop for all the princesses to watch or listen to the music.  For Christmas we usually have red and silver stockings, but thought they wouldn't really go with our theme this year.  I found these pretty white ones at Walmart and strung some silver and gold ball garland I found at Target above them.  The mantel is simply decorated with some white glittery branches and tinsel garland.


      I hung some Anna and Elsa canvas pictures I found at Walmart on the walls, since it is a Frozen party, we need a few things with them on it.


     What's Frozen with out the comedic relief, Olaf??  I placed him up there with some pretty sparkly branches in a vase filled with plastic snow.  On the other side I made a Let It Snow sign.


Onto the buffet tablescape....

     This was one of my favorite parts to decorate for the party.  I am ALL about tablescapes, if you haven't noticed already from my previous parties.  First thing I did was hang up a huge white sheet to hide the windows.  Then strung up some warm white christmas lights.  Then hung up two opalescent fringe curtains on top of the lights for some sparkle (found them on Amazon).  To cover the table I found a very pretty silver and white tablecloth at Target with I topped part of it with some white sequin fabric from Walmart.  Then placed some more white lights then some fluffy "snow" on top.


     On the left side of the table I used my apothecary jars and filled them with some plastic snow and some sparkly silver twigs, snowflakes, and ornaments I found at Walmart.  Then wrapped some snowy garland around them.


     The centerpiece was my favorite part of the table!  I found the Let It Snow sign at HB, on sale of course.  The branches were easy to make.  I spray painted some of them white, then drizzled on some Epson salt and glitter for that sparkly frosted look.  I also found some silver branches already done at HB.  I stuck them in a huge vase filled with some plastic snow.  To add a little sweetness to them, I hung some white Rock Candy Crystal Sticks, which looked like icicles and the kiddos could take home for a treat later (found them on Amazon).


     On the right side of the table, I place some more of those lit trees and Kinley's Elsa doll.  Then wrapped some more snowy garland around them.


     As for the food, I had a bunch!  All white of course to fit in with the winter wonderland theme.  Check out the Frosty Finger Food post for the recipes.


     Along the bar to the kitchen I draped a white tablecloth, set up some more white cone trees, a little snowflake JOY accent, a WinterMint candle, and Anna of course.  I also set out the party favors for the kiddos over there too.


     This party was definitley one for the books! I had so much fun planning and creating it.  Everyone was surprised and amazed at everything.  Makes me so happy to bring make some magic for all the little princesses.  Can't wait to share all the rest of the party with you!  Check it out tomorrow!

post signature

Snow Pops

     One of the first things that popped into my mind when coming up with a dessert menu for the Frozen party was some sparkly sprinkly yummy white cake pops!  So that's what I made for all the little princesses.  They were a BIG hit!
Recipe adapted from Divas Can Cook


What you need:

Any flavor cake, prepared according to box (I used a White Cake mix)
Vanilla Frosting 
2 packages melting chocolates (I used the Wilton Bright White Candy Melts)
Cake pop sticks (I found these at Hobby Lobby)
White sugar sprinkles


How to make them:

Make the cake according to the box instructions and let cool completely.
Then add the cake to a large bowl.
Crumble the cakes until it resembles fine crumbs.
Add in the frosting a little bit at a time until the cake is moist and can hold a ball shape, yet still slightly crumbly.
Use your hands to incorporate the frosting into the cake crumbs.
Use a mini ice cream scoop or melon baller, scoop out some cake, roll and shape into tight balls.
Roll the rest of the mixture into tight balls and place on a plate or a mini muffin pan.
Melt 2-4 oz of the melting chocolate in a microwavable safe bowl.
Dip the tip of a cake pop stick into the melted chocolate then insert it into the cake ball about half way, repeat with the remaining balls.
Freeze for about 20 minutes.
Meanwhile, prepare the decorating supplies.
Melt the remaining chocolate in a large microwavable bowl or cup (30 seconds at a time on 50% power, stirring each time after you take it out ), make sure you have enough chocolate to complete submerge the cake ball.
Remove the cake balls from the freezer.
Dip the cake balls carefully into the melted chocolate until covered.
Let the excess chocolate drip off, swirl and tap gently if needed.
Add the sprinkles while the chocolate is still wet (if hardens quickly).
Stick the decorated cake pop into a styrofoam block to finish setting.
Place into the refrigerator to speed up setting time, if needed.
When completely harden, set out to enjoy.
Can cover with a clear treat bag and ribbon to hand out as gifts or store them in a single layer in an air tight container or freeze them.
Enjoy!


post signature

Snowflake Cookies

     Another yummy sparkly sweet treat on the dessert menu are my all time favorite sugar cookies!  These are so easy to make and delicious! And of course, I had to make them snowflakes to go with the Frozen party!


Recipe from Martha Stewart


What you need:

Cookies
2 cups all purpose flour (sifted)
1/4 tsp salt
1/2 tsp baking powder
1/2 cup (1 stick) unsalted butter (room temperature)
1 cup sugar
1 large egg (room temperature, slightly beaten)
2 Tbsp milk
1/2 tsp pure vanilla extract
White sugar sprinkles

Icing
1 lb confectioner's sugar
5 TBsp meringue powder
scant 1/2 cup water

How to make them:

Sift together flour, salt, and baking powder in a medium bowl, set aside.
In a bowl of an electric mixer fitted with the paddle attachment, cream butter and sugar until light a fluffy, about 2 minutes.
With the mixer running add the egg, milk, and vanilla, mix until well combined.
With the mixer on low, slowly add reserved flour mixture, mix until well combined.
Transfer dough to a work surface.
Shape into 2 discs, cover with plastic wrap, and refrigerate for at least 1 hour.
Preheat the oven to 350˚F.
Line baking sheets with parchment paper, set aside.
On a lightly floured surface, roll out the dough to 1/8 inch thickness.
Using a cookie cutter (I used a snowflake) cut into the dough and transfer to prepared baking sheets, leaving an inch in between.
Leftover dough can be rolled out and cut once more.
Bake until lightly golden about 10 minutes, do not allow to brown.
Transfer to wire racks to cool.
While cookies are cooling, beat the confectioner's sugar, meringue powder, and water in a bowl of an electric mixer on low speed until smooth, about 7 minutes.
If icing is too thick, add more water; if too thin, beat 2 to 3 minutes more.
Place icing in a piping bag fitted with a small round tip or use a pastry spatula to decorate the cookies.
Garnish with sprinkles.
Let the icing dry to harden.
Then ENJOY!


post signature

Frozen Hearts

     Another sweet treat I made are these cute Frozen themed chocolate covered strawberries.  


What you need:

Fresh Strawberries (rinsed and dried)
Melting chocolate (I used Wilton Bright White Chocolate Melts)
White crystal sprinkles

How to make them:

In a microwavable bowl, melt chocolate in the microwave in 30 seconds intervals on 50% power stirring frequently.
Once the chocolate in melted, dip a strawberry and evenly coated.
Sprinkle on some sprinkles, set on some wax paper to dry.
Once completely dry, serve on a pretty platter.
ENJOY!

post signature

Snow Flurries

     While browsing through Walmart, I discovered these snowflake shaped Ritz crackers and thought they would be the perfect addition to our Frozen theme buffet table.  So I went on Pinterest and found a great cheese ball spread to go with them.

Recipe adapted from Crafts a la Mode


What you need:

2 - 8oz packages of cream cheese (room temperature)
1/2 cup finely shredded mozzarella cheese
1 clove garlic (minced)
Garlic powder to taste
Onion powder to taste
Salt and pepper to taste


How to make it:

Mix the minced garlic, garlic powder, salt, and pepper into the cream cheese.
Roll the cream cheese into a ball.
Roll or coat the ball with the mozzarella cheese.
Serve with crackers.
ENJOY!
post signature

Snow Trees

     To incorporate some savory and healthy food into the buffet was a little harder to come up with, since I was sticking to an all white food palette.  I have recently taken a love to cooking up Roasted Cauliflower every chance I get.  And since they are white and just so happen to look like little trees, these too were perfect for the Frozen buffet table!


What you need:

1 head of cauliflower (rinsed and dried)
Garlic infused olive oil
Salt and pepper

How to make it:

Preheat oven to 400˚F.
Line a baking pan with parchment paper.
Cut up the cauliflower into bite size pieces then place in a bowl.
Drizzle some garlic olive oil all over the cauliflower.
Then season with salt and pepper, toss to coat evenly.
Spread cauliflower on the prepared baking pan.
Bake for 20-25 minutes until starts to brown and crips up. (I like mine a little crispier, makes them sweeter)
Flip florets to toast on the other sides about half way through.
Take out of the oven and let cool a bit.
ENJOY!


post signature

Glacier Water

     With all that yummy food, we needed a special drink to accompany it all.  Why not some fun blue punch?  It actually tasted really yummy!


Recipe from Mom Endeavors


What you need:

1 container of Blue Hawaiian Punch
1 bottle of Simply Lemonade
2 bottles (2 liter) of Sprite
Ice

How to make it:

Pour all ingredients into a punch bowl.
Add in ice.
ENJOY!


post signature
Related Posts Plugin for WordPress, Blogger...
1 09 10