Saturday, March 3, 2012

Twilight: Breaking Dawn Birthday Party

     Ok, ok I will admit....I am a Twilight fan and definitely Team Edward!  With the recent release of the Twilight: Breaking Dawn Part 1 DVD as my inspiration, I decided to host a birthday party for one of my Besties.  At first, I couldn't decide if I wanted to decorate like the Bella and Edward's wedding or if I wanted to do a black, white, red chess theme.  Guess which one I chose??  You guessed it, the chess theme, was totally inspired by the cover of the fourth book.

     One of the first things I had to do was come up with a menu.  I tried to incorporate all of the guest of honor's favorite foods, from eggplant to Brie, to carrot cake and lemons.  I found some great recipes online and created an awesome menu!  All the recipes were really easy and so delicious.  Here's what we dined on that night:

* Butternut Squash, Ricotta, and Sage Crostini
* Honey-Tomato Bruschetta with Ricotta
* Eggplant-Feta Phyllo Pies
* Mushroom Goat Cheese Phyllo Bites
* Honey Walnut & Brie Tartlettes
* Polenta Cups with Braised Beef
* Chicken Satay Skewers
* White Cheddar & Rosemary Popcorn
* Lemon Meringue Pies
* Carrot Cake Cupcakes
(All the recipes are linked up to the website I found the recipe)

   
The Menu

Butternut Squash, Ricotta, & Sage Crostini

Roasted Tomato & Ricotta Bruchetta

Brie, Walnut, and Honey Tartlets


Mini Lemon Meringue Pies

Carrot Cake Cupcakes topped with Chocolate Chess Piece


   I also came up with some awesome cocktails and mocktails for the special evening.  Here's what we sipped on:

* Edward Elixir
* Jacob's Werewolf Brew (Edward's Eye)
* Bella Berry Spritzer (Sparkling Cranberry Apple Cider, Non-alcoholic)


     As far as the decorations go....I first had to set the mood.  I hung up red Christmas lights from the ceiling, then draped some black create paper criss-crossing each other to form a chess board on the ceiling.  I also tied some fishing line to some white feathers and hung them throughout the holes of the "checkered board" ceiling.  So as to look like they feathers were floating.  (If you have seen BD Part 1....then you know the scene I was going for!)   And of course, tons of red candles everywhere!  I hallowed out a little hole at the top of some red apples and set in a red tea light candle.  I set out black candelabras and even busted out the crystal candle holders (you know, because Edward sparkles) fitted with long red taper candles  I filled three wide vases with red crystals in the bottom, filled with water, and placed a floating red rose candle.  I also took four red pillar candles and glued some checkered black and white ribbon around them to tie in the chess board theme.  Tea lights and votives were set out on the table, buffet, and counter.  Like I said, red candles everywhere!
     The backdrop behind the table, is a black sheet with individual pages from a book pinned to it.  I also hung up a red table cloth to hide the computer and a black table cloth above the bar to divide the space from the kitchen.  It made the room feel so intimate, which was nice.
     For the tablescape, I draped a red table cloth on the table then overlaid a black one for some contrast color.  I wanted to make the table interesting, so I put some boxes underneath the black table cloth to make some staggering heights for placing food and decorations.  The center box, I placed a chess board under the cupcake rack.  The two boxes on the sides of the cupcakes I stacked up the Twilight books then a shiny silver candle holder topped with the hallowed apples with candles.   Below I placed another smaller box with a black cake platter for the pies.  In front of the boxes I laid out the white platters with the yummy food with little handmade food place cards.  I also printed out four quotes from the movie, put them on some pretty scrapbook paper accompanied with with some pretty flowers and gems, then framed them.  Put two on the table, one on the mantel, and one on the buffet.  Throughout the table, I put some extra white feathers, more red candles, some plastic crystals, and some white chess pieces.  The table turned out A-MAZ-ING!


     I also decorated the mantel and the buffet.  I thought simplicity was the way to go for the fireplace since the table is so busy.  Just the crystal candle holders with red taper candles, two apples with tea lights, and one of the framed quotes.  As for the buffet, I hung up a BD Part 1 poster that came with the DVD up above.  A few tea lights and another framed quote plus the party favors and birthday gifts completed the decorations.  For the party favors, I burned the soundtrack to Breaking Dawn Part 1 attached a Twilight Woods Bath & Body Works lotion, then tied it all up with a red ribbon and put a Twilight pin in the middle of the bow.  Everyone got to take home a little Twilight with them.


     Overall, I was very happy how everything turned out.  The food and cocktails were awesome, the guests were dressed to impress in their Twilight: Breaking Dawn inspired outfits, everyone loved playing the Twilight Scene It game (winners of course won The Golden Onion), watching BD Part 1 with friends with a box full of fresh popcorn is always a blast, and best of all the Birthday Girl was overwhelmed and so surprised!  This was a very fun party to host, I look forward to the next month where I will be co-hosting a baby shower for another dear friend.  Be on the lookout for those pictures to come!


Tuesday, February 7, 2012

Valentine's Day Cards

     It's come be a tradition for my son and I to make creative home made cards for every holiday.  So with Valentine's Day right around the corner we painted his palms red and placed his hand prints in shape of a heart.  Then we painted on some glitter paint and decorated with foam heart stickers. It was a little messy but a lot of fun.


Thursday, January 26, 2012

Valentine's Wreath

     Here's a really cute idea to make for Valentine's Day.  I saw a picture on Pinterest so my friends and I got creative and made our own versions.  They are really easy and lots of fun!


Thursday, January 19, 2012

Vintage Baby Shower


     Hi everyone, I know it's been awhile since I posted anything...so here's the most recent baby shower my friend and I hosted.  We were inspired by the old Dick and Jane books and vintage toys.  Photographs by Samantha Lovett.


Photographs taken by Samantha Lovett Photography


Tuesday, January 3, 2012

Christmas Day Dessert

I made this and it was sooooo good, I just had to share it!


Sticky Toffee Pudding

Ingredients

  • 8 tablespoons (1 stick) unsalted butter, room temperature, plus more for pan
  • 1 1/2 cups all-purpose flour (spooned and leveled), plus more for pan
  • 8 ounces pitted dates, finely chopped
  • 2 teaspoons baking powder
  • 1/2 teaspoon salt
  • 1 cup sugar
  • 2 large eggs
  • 1 teaspoon pure vanilla extract
  • Toffee Sauce

Directions

  1. Preheat oven to 350 degrees. Butter and flour an 8-inch round cake pan; set aside.
  2. In a small bowl, combine dates and 1/2 cup boiling water; set aside to soften, at least 10 minutes. In a medium bowl, whisk together flour, baking powder, and salt to combine; set aside.
  3. With an electric mixer, beat butter and sugar until light and fluffy; add eggs, one at a time, beating well after each addition. Add date mixture, flour mixture, and vanilla; mix just until moistened.
  4. Spread batter in prepared pan. Bake until a toothpick inserted in center of cake comes out clean, 55 to 65 minutes. Meanwhile, prepare toffee sauce.
  5. Remove cake from oven; cool in pan 5 minutes. To ensure it will come out easily later, carefully invert hot cake then return it, right side up, to pan. Using a toothpick, poke holes all over cake. Pour about 1 cup warm sauce over cake; let absorb at least 20 minutes.

Toffee Sauce

Ingredients

  • 16 tablespoons unsalted butter (2 sticks)
  • 1 cup heavy cream
  • 1 cup packed light-brown sugar
  • 1/4 teaspoon salt

Directions

  1. In a medium saucepan, combine butter, heavy cream, light-brown sugar, and salt. Heat over low, stirring, until sugar has dissolved, about 2 minutes. Simmer mixture over medium heat until reduced to about 2 1/2 cups, 8 to 12 minutes. If desired, reheat sauce over low before serving.

Saturday, December 24, 2011

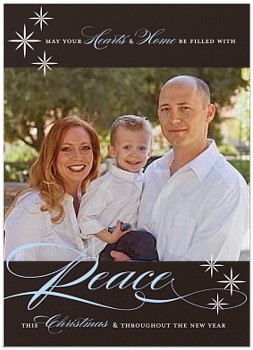
Christmas Card 2011

Hearts And Home Christmas Card
Shop Shutterfly for unique, personalized Christmas photo cards.
View the entire collection of cards.


Wednesday, December 21, 2011

Christmas Ornaments

     My family has a Christmas tradition of making home made ornaments and swapping them instead of presents between families.  Every year I come up with an ornament that features things around the area where we live.  Since, we live in the middle Pinot Noir wine country I decided to use wine corks that I have saved over the years.  It was really simple and turned out wonderful.  I was inspired by a photo on Pinterest.

     Here's all the tools you will need:
* Drill with small bit
* Wine corks
* Thin ribbon
* Different colored beads with large holes
* Crystal charms or tassles
* Darning or beading needle
* Scissors


Instructions:

1.Carefully drill a hole through the center of the cork lengthwise using a small bit drill.
2. Slide one or more decorative beads over the loop of the crystal charm or tassle.
3. Cut approximately 1 foot of ribbon and slip one end into the crystal charm or tassle loop (above the beads) then bring ends of ribbon together.
4. Thread the ribbon (now attached to the crystal charm or tassle) through the darning needle and bring up through the center of the cork then pull till the beads and tassle are in contact with the cork.
5. Slip one or more decorative beads over the ribbon then knot the ribbon several inches up leaving a loop to hang from Christmas tree branch.
6. Cut excess ribbon above the knot and use Fray Check (available at Joann.com) to prevent ribbon from fraying. You may also carefully use a lighter or match to slightly singe the ends of the ribbon to prevent fraying.
7. Glue the beads to the top and bottom of the cork to ensure they remain centered and in place.


Monday, December 19, 2011

Cinnamon M&M's

If you LOVE cinnamon and haven't tried these yummy cinnamony chocolate morsels......you better go get some before the holiday season is over!! I found mine at Target.


Related Posts Plugin for WordPress, Blogger...
1 09 10