Tuesday, August 18, 2015

Moving In

     The day had FINALLY come...we moved out of the hotel and into our new home!  Of course our household items haven't arrived, so we borrowed some furniture from post.  A couch, some chairs, dining set, and beds.  Which we didn't have but only a week, since our stuff arrived that Friday!  The military also loans out wardrobes (a form of a closet, since houses here don't have built in ones like the States), washer and dryer, and an American sized refrigerator/freezer (we have German style fridge upstairs in the kitchen, but is is quite smaller then the loaner) for us to use while we are here.   The first few days, while the hubby was at work with the one car we had, the kiddos and I explored our new town of Sindelfingen.

All packed up and ready to go!


Our keys and the underground garage opener


A couple of our new neighbors stopped by and gave us some welcoming gifts.  
Everyone here is so nice, we definitely found an awesome place to live!


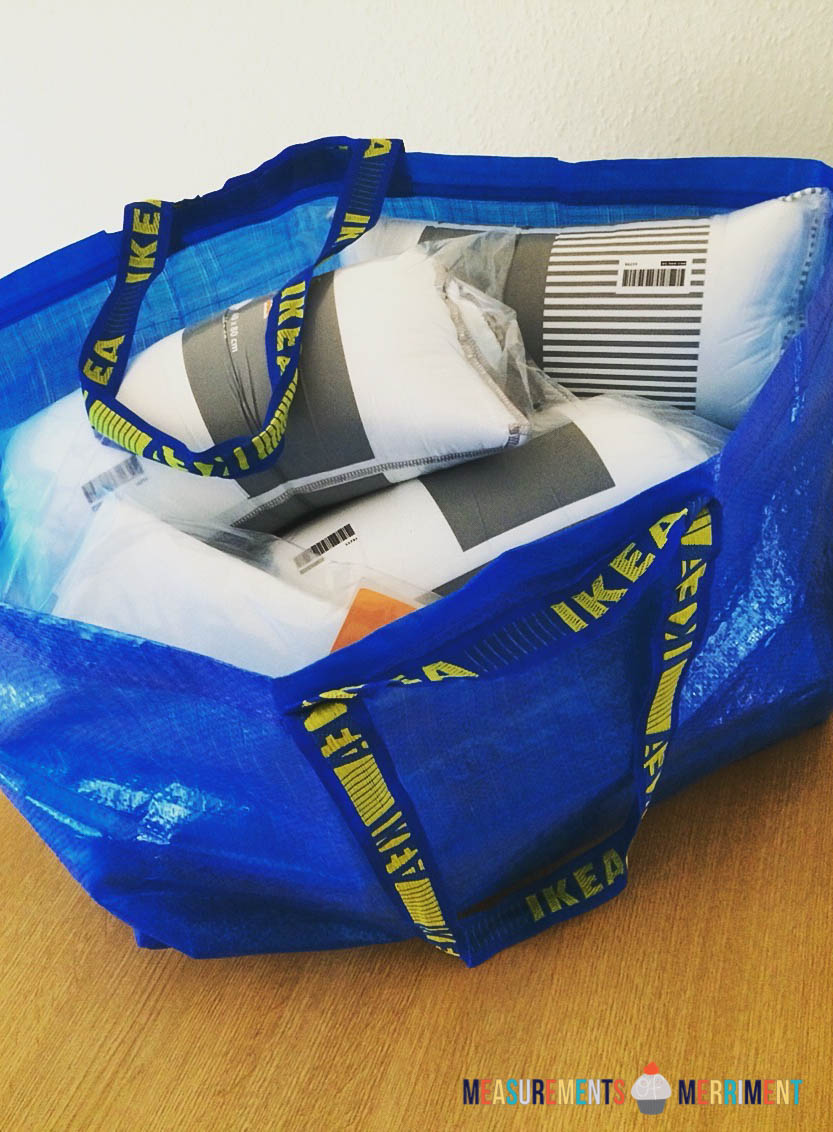
Since I forgot to pack our pillows in our unaccompanied baggage, 
we took our first trip of many to come to IKEA for some much needed pillows for us.

Walking around downtown Maihingen (which is the part of Sindelfingen that we live in) we discovered a small grocery shop Netto, an organic or as they say Bio shop, another specialty food shop, a ice cream cafe, a Doner Kabab restaurant, an Italian restaurant, two bakeries, 
a butcher shop, and a spielplatz (playground).
The kiddos and I walk down to the markets about twice a week for fresh fruits and veggies. 
They enjoy the ice cream (Eis) too!


Having fun at one of the playgrounds


Found this art sculpture around the side of the Burgerhaus.


There are some really pretty German style houses around ours.


The Bio market


Bretzeln from the Bakery and Erdbeeren from the Bio Market


Relaxing outside with the kiddos have fun on the trampoline


Our stuff is here!!


Some treats for the movers


Boxes, boxes, everywhere!


It's been about a month or so since our stuff have been delivered and I am still unpacking some!
Can't wait for them to be completely gone.
Till then, I'll just keep unpacking one at time.


post signature

Monday, August 17, 2015

Mushroom Risotto

  What goes better with Wildflower Honey & Lavender Roasted Chicken then some yummy earthy risotto??  I was totally inspired to make this when I saw some beautiful mushrooms at the local market.  So I picked some up and away I cooked!


Here's what you need:

1/3 cup dried wild mushrooms, preferably porcini
1 1/2 cups fresh cultivated mushrooms
juice of 1/2 a lemon
1/3 cup butter
2 TBsp parsley, finely chopped
4 cups beef or chicken stock
2 TBsp olive oil
1 small onion, finely chopped
1 1/2 cup medium-grain risotto rice (I used arborio)
1/2 cup dry white wine
salt and fresh ground pepper
3 TBsp freshly grated Parmesan or Romano cheese


How to make it:

Place the dried mushrooms in a small bowl with about 1 1/2 cups warm water.
Soak for at least 40 minutes.
Rinse the mushrooms thoroughly.
Filter the soaking water through a strainer lined with paper towels and reserve.
Wipe the fresh mushrooms with a damp cloth and slice finely.
Place in a bowl and toss with the lemon juice.
In a large heavy frying pan or casserole melt one third of the butter.
Stir in the fresh sliced mushrooms and cook over moderate heat until they give up their juices, and begin to brown.
Stir in the parsley, cook for 30 seconds more and remove to a side dish.
Place the stock in a different saucepan.
Add the mushroom water and simmer until needed.
Heat another third of butter with the olive oil in the same pan the mushrooms were cooked in.
Stir in the onion, and cook until it is soft and golden.
Add the rice, stirring for 1 to 2 minutes to coat it with the oils.
Add the soaked and sautéed mushrooms and mix well.
Pour in the wine and cook over moderate heat until it evaporates.
Add one small ladleful of the host stock.
Over moderate heat cook until the stock is absurd or evaporates, stirring the rice with a wooden spoon to prevent it from sticking to pan.
Add a little more stock and stir until the rice dries out again.
Continue stirring and adding the liquid a little at a time.
After about 20 minutes of cooking time, taste the rice.
Add salt and pepper.
Continue cooking, stirring, and adding the liquid until the rice is al dente, or tender but still firm to the bite.
The total cooking time of the risotto may be from 20-35 minutes.
If you run out of stock, use hot water, but do not worry if the rice is done before you used up all the stock.
Remove the risotto pan from the heat.
Stir in the remaining butter and Parmesan cheese.
Grind in a little black pepper and taste again for salt.
Allow the risotto to rest for 3-4 minutes before serving, then ENJOY!


post signature

Sunday, August 16, 2015

Our New Home

     I know it's been awhile...a LONG while!  So I thought I would start blogging again by posting up our new home!  We've been living here for about a little over a month now, so I will have to post up again with pictures with all our furniture and decorations.  But for now here ya go...please note these were taken while we were viewing the house, so ignore all the little extras in the pictures.

Here's the outside of the house...


Entering through the front door


  There is a little guest bathroom on the right inside the entry way.


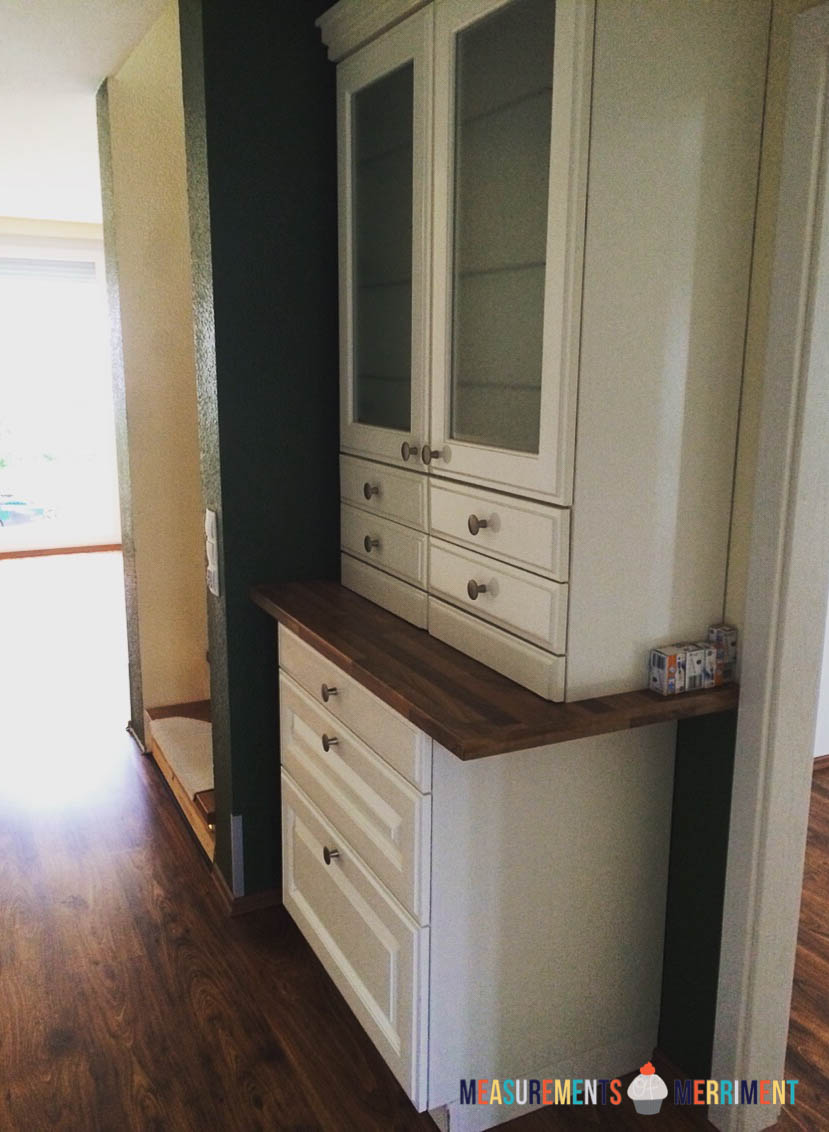
     As you walk out of the entry way into the house this built in hutch type thingy is perfect for storing all the reusable shopping bags for walking to the markets, helmets for scooter riding, steins for "beer time", drawers for keys, extra lightbulbs, and all that other stuff.


     Here's the kitchen, my FAVORITE part of the house!  It's big, open, lots of counter space, and large cabinets perfect for all my pots and pans.  However, my baking stuff has no where to go.


     This is the other side of the kitchen, I planned to put up some racks for my baking stuff and pantry items.


     Around the corner is the living area, which leads out to the back patio.


     This is the other side of the living room, we planned to put our dining table here.


     When you head upstairs, this is the first bedroom, it's the smallest of the four.  So I plan on making this my craft/photography studio.  Big plans for this room!


     The next room is going to be Liam's.  He needed the biggest one on this floor for all his furniture.  


     This is the bathroom that the kiddos will be using.  Can't wait to decorate it all fun for them.


     Around the corner from the bathroom is Kinley's room.  It's a little smaller then Liam's but we will definitely make it work.  Can't wait to decorate her room!


     On the top floor, yep the fourth floor, is our room!  We have this HUGE build-in closet, which is great!  So we don't have to use the ones from post, but it also limits how much furniture will fit in our room.  Especially, since we have a king size bed and two sets of dressers, and night stands


     We do have our own bathroom, which is nice!  The owner even left a nice set of drawers which I can put all my makeup, hair stuff, towels, etc. in there.


There's a door from our room and in the hallway that leads out onto a balcony.
One day we plan on planting some pretty flowers and really making it 
as beautiful as the others we have seen around our neighborhood.


Well, thats just going up in our house.  We also have a level down stairs to the basement which
has a laundry room (with our loaner washer and dryer) and another room used for storage.  They are currently a big mess full of boxes and stuff from our move in.  So, I will wait to post a picture of that!
We also have access to an underground parking garage where we park our 
cars and store our garbage and Bio cans.


I still have some boxes to unpack and some organizing to do but I'm 
definitely looking forward to making our new house into a home!


post signature

Bianco Pizza con Pomodoro e Basilico

     I was thumbing through a Cooking Light magazine and came across this recipe.  It looked so good I had to make it and I was right, it was delish!
     

Recipe from Cooking Light


What you need:

1 (10oz) Italian cheese-flavored this pizza crust 
1 tsp cornmeal
Cooking spray
3 TBsp basil pesto (refrigerated or homemade)
1/2 cup shredded fresh mozzarella cheese
1/2 cup part-skim ricotta cheese
1/2 cup sliced small tomatoes
1/4 tsp black pepper
1/4 cup small fresh basil leaves
Crushed red pepper (optional)

How to make it:

Preheat broiler to high.
Place a baking sheet in oven; heat for 10 minutes
While baking the baking sheet heats, place crust on another baking sheet sprinkled with cornmeal.
Lightly coat crust with cooking spray.
Spread pesto evenly over crust, leaving a 1 inch border; sprinkle mozzarella evenly over pesto.
Dollop ricotta, by teaspoonfuls, evenly over mozzarella.
Slide crust onto the preheated baking sheet, using a spatula as a guide.
Broil 5 inches from heat for 5 minutes or until cheese begins to melt.
Remove from oven; top evenly with tomatoes, black pepper, and basil.
Sprinkle with red pepper, if desired.
Slice it up and in ENJOY!


post signature

Wildflower Honey & Lavender Roasted Chicken

     Scrolling through my favorite cookbook, The Vineyard Kitchen, I noticed this recipe and thought I should make this.  There is lavender growing everywhere around my house, so this would be a perfect recipe!  It was delish!     


What you need:

4 sprigs lavender with flower plus 8 for garnish
1/4 cup wildflower honey
Salt
8 sqaub (but I used 2 chickens)
Fresh ground black pepper
2 TBsp extra virgin olive oil, plus more for rubbing the birds
1 TBsp unsalted butter
1 cup dry white wine

How to make it:

Mix together the 4 sprigs of lavender, honey, 2 Tbsp of water, and 1 tsp of salt in a medium saucepan and heat gently until the mixture simmers.
Turn off the heat and let the lavender steep until ready to use.
Cut off the neck, the wings tips at the second join from the tip, and the tail of the squab (chicken).
Season the cavity of the birds with salt and pepper and tie the birds (this can be done up to a day in advance; cover and refrigerate the birds).
Preheat the oven to 400˚F.
Rub the birds with olive oil and season with salt and pepper.
Heat a large sauté pan over medium-high heat and add 2 Tbsp of olive oil and 1 Tbsp of butter to coat the bottom of the pan.
Let the butter brown lightly, then add the birds to the pan breast side down.
Do not crowd them in the pan.
Sear them in two batches if necessary.
Sear them until all sides of the birds are golden brown, about 10 minutes.
Adjust the heat as needed if the pan gets too hot and starts to smoke.
Turn the birds as necessary with a pair of tongs.
Be careful not to break the skin.
Remove them from the sauté pan and place them in a large roasting pan.
Drain the excess grease from the sauté pan. 
Add the wine to the sauté pan and bring to a boil.
Scrape the pan to remove an caramelized juices and bits of meat.
Reduce the hear and simmer until the wine is reduced by half, about 5 minutes.
Pour the wine over the birds.
Brush the birds liberally with the reserved honey mixture.  
Roast in the preheated oven for 30 minutes.
Baste the birds with the pan juices and brush with more honey.
Roast another 20 minutes.
Remove from the oven and brush one last time with honey.
Check for doneness, if still raw, cook a little longer.
If fully cooked, let the birds rest for 10 minutes before serving.
Search the birds on a platter with the accompaniments of your choice.
Garnish with lavender sprigs and ENJOY!


post signature

Saturday, August 15, 2015

Shaved Zucchini Salad with Almonds & Parmesan

     A few weeks ago the hubby invited one of his coworkers over to dinner, since he was new to the area.  So I wanted to make a yummy meal.  I have been so inspired by my new The Vineyard Kitchen Cookbook and all the fresh seasonal food here, I just had to try out some new recipes!  Here is one of my newest favorites!  Hope you like it as much as I do!


What you need:

1/2 cup balanced slivered almonds (I used whole almonds)
2 lbs small zucchini (2 inch diameter)
1 lemon
Fleur de Sel
Freshly ground pepper
1/2 cup fresh Italian parsley leaves, fluffy not packed
1/2 cup shaved Parmesan cheese
1/4 cup extra virgin olive oil

How to make it:

Preheat the oven to 350˚F.
Spread the almonds on a sheet pan and toast them in the preheated oven until they are golden, about 8 minutes.  Reserve.
Wash the zucchini and dry them.
Trim off the ends.
Cut the squash in half lengthwise.
By hand or using a mandolin (I used a vegetable peeler), slice the zucchini on the bias as thinly as possible.
Reserve in a big bowl.
To assemble the salad, toss the zucchini with the juice of the lemon and season with the Fleur de Sel and pepper.  Add the toasted almonds, parsley leaves, Parmesan cheese, and olive oil.
Adjust the seasoning to taste and serve immediately and ENJOY!


post signature

Apricot Glazed Pork Chops


     I was given this cookbook, The Vineyard Kitchen, as a goodbye gift from my friends in New Mexico and I can honestly say it has become one of my favorites!  I love all the recipes I have made from it.  They are easy to follow with fresh ingredients!  I can't wait to share more!  For now, here's the recipe for the Apricot Glazed Pork Chops...


What you need:

Brine
4 large garlic cloves
2 TBsp peeled, thinly sliced fresh ginger
1/2 cup kosher salt
1/4 cup sugar
1/2 cup chile flakes
1 bay leaf, fresh or dried
8 double-cut pork chops, 1 1/2 inches think

Glaze
2 lbs very ripe apricots
1 cup brown sugar
3 Tbsp white wine vinegar
1/4 tsp  chile flakes
2 TBsp mined ginger
2 tsp mined garlic
2 tsp salt

How to make it:

Prepare the brine.
Peel and slice the garlic cloves in half.
Place all ingredients in a medium pot with 5 cups of water.
Bring to a boil, turn the heat down, and simmer for 5 minutes.
Cool completely before using.
Place the pork chops in the cold brine and let them marinate overnight in the refrigerator.
Prepare the Apricot Glaze.
Wash, halve, and pit the apricots.
Chop coarsely.
Combine all the glaze ingredients with 2 cups of water in a pot and bring to boil.
Reduce heat and simmer for 40 minutes or so until it has thickened.
Cool and puree in a blender or food processor fitted with the steel blade.
(The glaze can be made up to 4 days in advance and stored in the refrigerator)
Preheat the grill or the broiler.
Remove the chops from the refrigerator, drain well, and pat dry before grilling.
Discard the brine.
Brush the chops lightly with olive oil.
No additional seasoning is necessary.
Grill or broil for 10 minutes on one side and turn over and brush with the glaze.
Grill or broil the second side for 10 minutes, turn over and brush with the glaze.
Cook an additional 1 to 2 minutes on each side to lightly caramelize to glaze.
To test for doneness, let the chop rest for 5 minutes, then cut into the meat at the bone, the meat should be rosy pink and opaque.  
If it looks rare, continue to cook for 4 or 5 minutes more.
Serve them with some pasta salad and broccoli then ENJOY!


post signature
Related Posts Plugin for WordPress, Blogger...
1 09 10